Body
One of the last messy stages and where you start to see things happening and a faster pace.
09/07/2011
I managed to rally the troops so that we could all move the shell in to the workshop. So that I can begin to work on the beetle.
13/07/2011
I managed to get a fair bit of work done on the shell today although most of it was stripping it all the electrics and the sound insulation out of it.
.jpg)
.jpg)
It was a bit messy so Henry the Hoover also came and helped out.
And some of the crap I took from the car.
.jpg)
.jpg)
I also ordered a electric fuel pump as well.
16/07/2011
I started to clean up the rusty areas to see how bad the damage is, after a lot or work I uncovered this.
.jpg)
.jpg)
.jpg)
.jpg)
.jpg)
.jpg)
.jpg)
Once we had done this the front clip needed replacing so we set about getting it off, didn’t take much doing once the angle grinder was fired up, we ended up with this.
Then to test fit the new clip, I already had this as it come with the car.
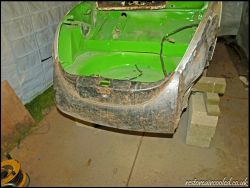
As for the stripping of the interior.
23/07/2011
Bit of progress today, I’ve been cutting away at the body to see what’s under the bad patches. As usual there is ‘bodging’ which includes what must be tiger seal to hold the heater channels in. To be fair there isn’t much in the front inner wing to repair. Anyways here is some photo’s.
29/08/2011
Right I best crack on with the build as its been a while since I have worked on it, I’m now at the stage where it is just cutting something out and welding a new bit it so the pics have suffered but I still have managed to do it. First bit was to repair the strut mount.
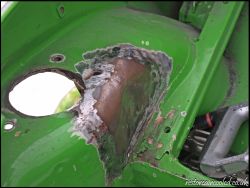
Next up was the door shut, just where the hidges go so as you can imagen this wasn't the easiest thing to do but after putting the door on then off then on we soon got it figured to we crack on with welding that up.
.jpg)
We also welded the heater channels in correctly and seam sealed it all up so that no water can get in the joint and rust all over again.
.jpg)
Also while on holiday I picked up some wings and some other bits so the costing has gone up
30/08/2011
More cutting and welding so off we go. First up was the frame head repair both sides first was the passengers.
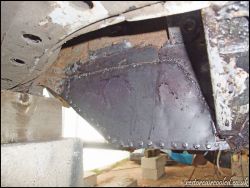
Then the other side all crusted and welded.
.jpg)
I had some scraps of metal left over and a little more time before it was dark so I welded a little piece to the very front of the beetle were it had rusted away.
.jpg)
This wasn't a easy piece because the metal wasn't very thick so I had to be careful with the welder.
31/08/2011
First things first this was what I was up against. A lot of weld that wasn't that strong.
.jpg)
Then it was to cut out the inner wing, managed to get a photo of this as my dad was having a butchers at it.
.jpg)
Then it was to weld it all back in. But I have good news my welding is also getting a lot better. Well it holds.
.jpg)
.jpg)
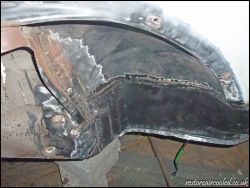
Its slowly getting there just taking some doing that’s all.
01/09/2011
More cutting more welding, again it getting hard work because I’m currently never seem to be getting anywhere but I best crack on with the work so onwards door shuts. So got some pictures of this.
All nicely welded in which is great took a lot of hitting and a few choice words which seem to have made it fit. I also decided to put the front end together to spur me on.
.jpg)
.jpg)
This seems to be coming along now and looking like a beetle.
02/09/2011
On with fixing the front part of the beetle this seems to take for ever because I had to make the panel out of a flat piece of metal but we eventually got it fitted and welded up.
.jpg)
.jpg)
And I also cover the thing in krust just to stop any rust coming up. I also knocked up another little bit for the front nose that had rusted away.
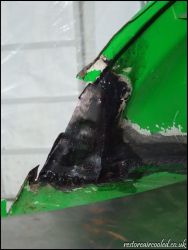
I also bought some stainless wing bold so I also had time to do the front of the front arch so welded that in.
09/09/2011
Front clip welding time this is the last bit on the front of the beetle to weld hopefully, but before that I had to weld some new bolts in place once they had been done then welded the front clip on.
.jpg)
And on with the bolts and the wings, I also put the bonnet on so that it looks complete.
.jpg)
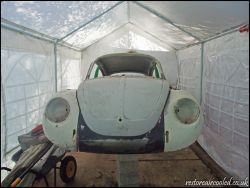
So that is how is how it stands.
15/09/2011
Starting on the rear of the car which makes a change from the front, the back doesn’t look half as bad, but after we had attacked it with the wire brush we ended up with something like this.
.jpg)
.jpg)
As you can see it isn’t going to be a simple fix, any way let get the grinder out and see what’s what.
.jpg)
.jpg)
.jpg)
.jpg)
Then we come across and massive chuck of metal so out with that too.
With then left the car looking like this.
.jpg)
So then I could start to make the panels back up, with wasn't very easy because it was a complex shape.
.jpg)
Now that that is welded all on I could then do the next piece on which was a lot more bendy but with the help of the hammer we managed to weld it all in place.
16/09/2011
More welding again didn’t manage to get much don’t this time but a little progress.
23/09/2011
This time it is to do the outside of the inner wing but the good news is that we got loads done today. It took a lot of doing because we used a little thicker metal because of the body mounting bracket needed to be fix, another problem we came across was the heater channel end plate replacement panel needed some convincing for it to fit but the big hammer seemed to fix the problem.
30/09/2011
Yes more welding, nearly finish the welding which can only mean that progress has been made, also some more good news the near side rear has had some welding but it is good weld so I’m not having to re do all of it so got plenty to done.
.jpg)
.jpg)
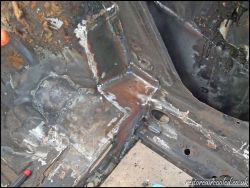
With the weather been well I flatted the two rear wings ready for spraying so there all nice and smooth ready for primer.
10/10/2011
Update time, not a massive update to be fair just spending a couple of hours prepping the bonnet and the two front wings ready for the primer with the help of mick who popped by, the wings are ok but the bonnet just needs a little bit more welding to it so I will do that along with the doors and the deck lid. Anyways photos.
18/10/2011
Welding time, meaning that the light is at the end of the tunnel which is great, first to weld up was the heater channel end plate. This took a little trimming and convincing with the hammer but it got there.
And then with the other little bit, this is on the part where the rear seats sits
The next bit to do was to put the welder down at to remove the valance because I want to have a removable one, which seams a great idea till I tried to take the old on off. To say it had some spot welds would be an understatement.
.jpg)
.jpg)
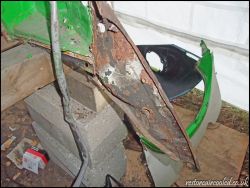
Just got to clean it up a figure a way of fitting a removable one in.
24/10/2011
Not a great deal done today but still managed to get some done, all today consisted was is cutting of the rear arch.
27/10/2011
Not many photos taken because I keep forgetting to take them but I made some good progress it managed to put the repair panel in, this looks a simple task but takes ages because you have to line it up with the other side otherwise the rear valance won’t fit. Anyway I managed to get a photo of it welded in place.
17/11/2011
Got plenty done today or it felt like it. We eventually after much cursing and hammering got the rear valance to fit just nice. One we had it all nice and fitted we had to weld washers in place so that the wing bolts can hold it in place, this was pretty easy. Just fit the washer and bolt and weld the washer in place but not the bolt. Simples
18/11/2011
Today was filled with the little bit that were left to do at the metal work stage of the shell, the first thing to do was to weld up the little hole in the rear valance.
.jpg)
The next bit was a little more welding; it was on the front of the car where there had been a few holes in it. But managed to weld it up very nice.
And yet not more things doing, this was just the simple krusting of the rear valance welds so they didn’t get any rust on them.
While I was at it we decided to fit the doors just to make sure they fit, they fit all nice after a little adjusting which was great.
.jpg)
.jpg)
Next was to tidy the workshop, this seem to takes ages because there was that much stuff on the floor.
And the last task of the day was to roll the shell onto its side so that we could Shultz the underside of it.
15/12/2011
Now that the beetle is on its side I can get to Shultz the underside of the cars, the first thing I had to do was to make sure it was clean so it will stick to the car when I spray it on, and then after this I need to mask it up so I don’t get Shultz on the bits I don’t want to. I forgot to get pics of this because I was so busy.
After I had masked it was ready for the Shultz, this is the results I got.
.jpg)
.jpg)
.jpg)
Once this is all dry I can put it the correct way up.
24/12/2011
Yes Christmas Eve and I have worked on the beetle, not much though because it is cold, and everything you touch is. The first thing to do was to clean the arch ready for stone chip, one I had done this I kusted it just to make sure nothing turned to rust.
.jpg)
.jpg)
One we had done this we then rolled the car the correct way up and rested it on some wood.
.jpg)
.jpg)
.jpg)
When we put it the correct way we noticed a little hole in the arch so out came the welder to sort that out.
.jpg)
And that all I did today because it was very cold.
03/01/2012
Didn’t do much today as we didn’t have too much time, but we had another look at the doors, After looking at the white ones they looked as if they had been modified so we got another set of red one which was just lying about. So we fitted one of them and it was a good fit the first time around. So I am going to repair the bottom of them and use them on the beetle.
06/01/2012
First thing to do today was to wire brush the arches to get the crap off then so that the stone guard will stick to it.
.jpg)
Then after that we needed to seam seal any last bits that we had missed. There wasn’t too much just the interior area. But before that we krusted the area where there was any little bits of rust.
.jpg)
While all that was drying I decided to take the steering linkages apart because all the boots and rubber were not good so they need replacing. Luckily I had a air gun so removing the rusty bolts wasn’t too hard.
.jpg)
Then the next step was to make up any area that didn’t need stone guarding this took some time but eventually got there.
Once masked up it was time to spray the stone guard this took some doing because it’s a very thin paint and it took a lot of doing. But managed the first coat on I will do another later on when it has set.
13/01/2012
We also sorted the gear box brace and painted it but I forgot get to get a picture of that. Next on the list was the last coat of stone chip, and that god for that its horrible stuff to use, but it does give a good finish anyways I got plenty of photos.
.jpg)
.jpg)
.jpg)
.jpg)
And that all that I managed to do but the paint prep will be soon underway.
22/01/2012
I managed to get a few hours in on the beetle today, and I spent my time prepping the body for paint I used the dual action sander on the roof and rear 3 quarters and then used just sand paper on its own. Took a while but I did get a lot of the panels prepped. I did manage to get plenty of photos but they aren’t too good as it was rather dark when I took them.
.jpg)
.jpg)
.jpg)
.jpg)
.jpg)
You can’t tell which panels have been prepped but the roof and sides have been prepped all that now needs prep is the engine bay and the under bonnet area also the front valance. And then the whole of the interior.
23/01/2012
More prep work, I’ve managed to completely do the front 3 quarter on bother sides and I have also done the roof and scuttle area. I’m not onto the more fiddly bits such as the engine bay and under bonnet area but I have started the under bonnet area. And I did make a start on the dash as well any ways I managed to get some photos.
27/01/2012
Started to work on the doors first thing was to mark the area, which needed to be cut. So here is the photo.
.jpg)
And then simply cut a lot the line which revealed the other side.
We then went to weld in the part that we had bought off eBay, but as we went to fit them we noticed that the inner parts are sided and even that I bought a left on and a right one the part numbers were different but they were the same part so that all I could do today.
02/02/2012
I didn’t get any photos I had simply forgot to because I was too busy trying to keep warm as its on -2 and I’m still yet working on the beetle but, today I managed to finish the drives side door because I went and got the new part from the guys down gsf as they did me a good deal. It all went well. I will have some photos tomorrow.
03/02/2012
Managed to get plenty done today with was rather good, the first thing to do was to see if the finished door that we did yesterday lined up of if we had completely messed the whole thing up, and after a lot of adjusting and hitting of hammers we managed to get it all lined up all nice. Got the photo for proof too!!!
.jpg)
Not the best photo but you get the idea, the next thing to do was to repair the other door, this didn’t seemed as rotten at the bottom as the drivers door but by the time we were done we ended up using the same pieces, this one went easier because of the practice on the other door, only managed one photo of the seam sealer drying/setting.
.jpg)
Also while my dad was helping out with that I whipped out the DA to prep the deck lid, the outside was simple to prep, it has had some filled but it doesn’t look too bad. As I went to do the inside it wasn’t as easy as there are plenty of little fiddly places that need prepping, I didn’t get it all done but did some work on it.
17/02/2012
Back to working on the beetle again, didn’t get loads done but it was some little bits that needed doing, first thing on the agenda was to do the bonnet seal holder (the little metal strip). To do this I first had to cold galvanise spray the strips and where they were been welded to..jpg)
.jpg)
Next was to then clamp them and weld them in place, this took some doing as its only thin metal but managed it in the end. Also painting some more galvanise spray onto it to for safety.
.jpg)
Also managed to prep the passage door and both front wings, I didn’t get any photos because I forgot and everyone know what a door looks like
18/02/2012
Spray time is wasn’t the best conditions and the tent is getting cramp now but I still soldiered on and managed to spray the inside of the door, and the passenger wing, the wing has a couple of little dints but I lick of filler will soon sort that out. Nothing much to say but grabbed a few photos.
19/02/2012
Finished doing some more priming today as it was good weather; I did the other wing that was already prepped, here is it sat in primer.
Then onto the other side of the door so I can see what area I have to fill. But it does look better been one colour
Also when it had been sprayed I have seen a little bit that I didn’t weld correctly, so I will get the welder back out to sort that problem out.
24/02/2012
Well its filler time, and what a job that can be. Its a lot of sanding and applying. So not much of a right up but we all know what filler is. Anyway on with the first skim of filler..jpg)
Sand that down till and then apply the next lot of filler, to get the low points
.jpg)
Sand that down, and apply a little bit more
.jpg)
And sand that some more, and ended up with this
But looking at the panel it needed some more
.jpg)
Its near as dam it but my arm is arching, it may seem like a lot of filler but it’s a few thin layers built up. We also managed to fee the heater cable holes at the back of the chassis, so we threaded wide copper pipe through so that the cable can get through.
02/03/2012
More and more sanding, first off was to put another layer of filler onto the door. And we then put some matt black aerosol onto it to see where the high parts are and there are a few low bit so it does need some more filling putting on it.
I mixed so much filler I put some on the other little area so it didn’t go to waste. Any way I got some photo’s not great ones.
.jpg)
.jpg)
With them bits done I was going to put some more filler on the door but. I really lost faith so I prepped some of the engine bay.
03/03/2012
Sanding, sanding and yet not more sanding, but I’m sure it will be worth it in the end. The right up will be getting shorter because they are all about the same think which I prep. Anyway the first thing to do to-do was to do skim the door.
And while that was going off I etch primered the other parts that will need some filler putting on them.
Next up was the last little bit off filler on the door.
As I had mixed up a little bit too much filler I decided to give the rear three quarter panel and skim.
.jpg)
Then it was to sand the three quarter down.
.jpg)
It needs a little bit more work but nothing too major. I would have mixed some more filler but I was getting tired and I wanted to finish the door off. So I set off sanding again and managed to finish it.
05/03/2012
More and more prep, the driver’s door is 90% finished all that needs doing to it is a little touch of stopper to get rid of the little marks in the doors but nothing major..jpg)
Next up I worked on the rear three quarter panels but got arm ache before finishing.
06/03/2012
Still on with the filler, I managed to get some stopper to do the doors so I applied that where it is needed on both doors.
.jpg)
.jpg)
While this was drying and to have a break for all the sanding I found some bumper irons that looked a little rough, so I wire brushed them and then painted them in some por15 and they have come up like new.
Then it was back onto using the filler, this time it was the 2 rear three quarters so some more sanding and a little bit more filler.
We then called it day and went for a cuppa.
08/03/2012
Well I’m still ploughing through the filler stage but have managed to get plenty of it done, and I must say it is starting to take shape. All of the major bits are done. First up is the rear three quarters
Next up is the lower B pillars
.jpg)
.jpg)
.jpg)
I also managed to finish off the inside of the door
And there was the strut top
Lastly the rear valance needed a little tlc too.
10/03/2012
Well we’ve defiantly put some work in today, got loads done and generally made good progress first up was to stone chip the engine bay because it seems to be a good decision as it is an awkward area to get a mirror finish on.
Then behind the dash area as you don’t really see this bit.
.jpg)
And then while that was drying it was time to sort the last bits of prep out.
Then it was time to mix the primer, I know this isn’t the best way of doing it but its work for the past couple of years.
.jpg)
Then the bit I’ve been waiting for, spray time. Eventually did it miss a few bits and it only dusted n in other places but I need some more primer. But I’m rather happy with it been all one colour.
16/03/2012
Managed to get plenty of body work today, it really coming together now. So the first thing up for spray was the doors in etch primer.
As you can see by the pictures I have a nice rack to hang anything off which seems to be a life saver at the minute. Next up was the deck lid and the under bonnet tidy thing. The deck lid needed a little bit of filler but it looks alright now
Then after that that it was onto the bonnet, this also needs a little filler where it had been welded earlier, this was an awkward panel to spray even on the jig but I still managed to do it.
Will plenty of light still we prepped the 2 rear wings and gave them a coat of primer.
As there was a little bit of primer left in the gun I quickly did the deck lid handle.
I also quickly sprayed 2 wings in the 2 different colours I’m trying to pick. This wasn’t the best spray it was just to have a look at the colours.
I have picked the colour but I won’t be saying until the colour coat is put on.
29/03/2012
More primer, this time it was high build primer so it will start to take shape, I did all the priming in one go, but stopped half way through for a minute and the primer set in the gun so after some cursing I managed to clean it all and coat the whole lot in primer.
.jpg)
.jpg)
.jpg)
.jpg)
.jpg)
.jpg)
31/03/2012
Having picked up some very cheap door I decided to give them a test fit, and thank god they are perfect fit a nice equal gap all the way round the door.
07/04/2012
Now the boring part of the spray job starts, the flatting process begins, a little trick to make sure it was really as flat as it could be is to dust black on so when it’s all gone the primer must be flat. Not much to say really but I managed to get some photos.
08/04/2012
With me getting new doors they had to have a lick of etch and high build primer so it was on with that.
20/04/2012
A lot of wet sanding has been happening over the last couple of days but there haven’t been any updates because all it would be is the same thing over and over so I cut it out and concentrated on getting the panels perfect ready for painting as I want it the best it can be. Here are some photos of it all wet sanded.
.jpg)
.jpg)
.jpg)
.jpg)
.jpg)
.jpg)
Also today is the day it will be going to the body shop for the colour, I was going to do it myself. But I got talking to a guy who can do it cheap for me at a proper spray booth so I’m going with that, so first think was to get the body rolling so on with a home mod.
.jpg)
Then it was to load the Freelander and my Clio to take it the body shop.
I didn’t get any of it in the trailer as I was running late.
23/04/2012
I popped down to the body shop to just do a last few bits on the beetle shell, I sanded the wheel well area down under the bonnet and under the deck lid.
24/04/2012
I has some more work to do to the beetle I finished up a few little bits I could see and sorted the b pillar out of the driver’s side.
25/05/2012
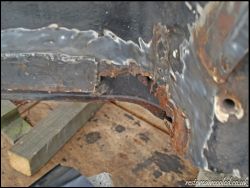
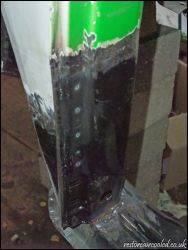
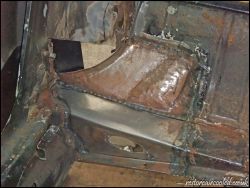
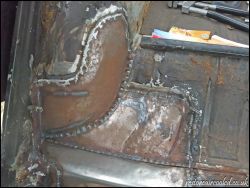
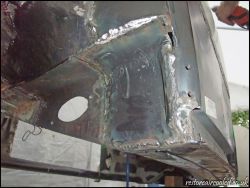
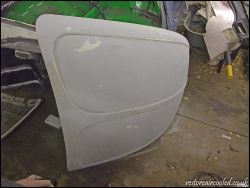
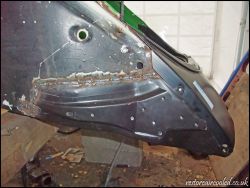
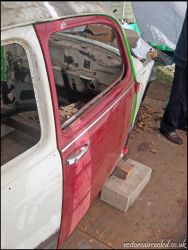
Well the day had finally, after many days in the body shop helping out prepping the beetle so it’s at the best it can get; it is time to get the beetle back, as I hadn’t seen another beetle in the same colour I was unsure if it was the correct colour, but soon as I seen it, it was the correct colour. Anyway here is it as it got to mine.
.jpg)
.jpg)
.jpg)
.jpg)
.jpg)

.jpg)
.jpg)
.jpg)
.jpg)
.jpg)
.jpg)
.jpg)
.jpg)
.jpg)
.jpg)
.jpg)
.jpg)
.jpg)
.jpg)
.jpg)
.jpg)
.jpg)
.jpg)
.jpg)
.jpg)
.jpg)
.jpg)
.jpg)
.jpg)
.jpg)
.jpg)
.jpg)
.jpg)
.jpg)
.jpg)
.jpg)
.jpg)
.jpg)
.jpg)
.jpg)
.jpg)
.jpg)
.jpg)
.jpg)
.jpg)
.jpg)
.jpg)
.jpg)
.jpg)
.jpg)
.jpg)
.jpg)
.jpg)
.jpg)
.jpg)
.jpg)
.jpg)
.jpg)
.jpg)
.jpg)
.jpg)
.jpg)
.jpg)
.jpg)
.jpg)
.jpg)
.jpg)
.jpg)
.jpg)
.jpg)
.jpg)
.jpg)
.jpg)
.jpg)
.jpg)
.jpg)
.jpg)
.jpg)
.jpg)
.jpg)
.jpg)
.jpg)
.jpg)
.jpg)
.jpg)
.jpg)
.jpg)
.jpg)
.jpg)
.jpg)
.jpg)
.jpg)
.jpg)
.jpg)
.jpg)
.jpg)
.jpg)
.jpg)
.jpg)
.jpg)
.jpg)
.jpg)
.jpg)
.jpg)
.jpg)
.jpg)
.jpg)
.jpg)
.jpg)
.jpg)
.jpg)
.jpg)
.jpg)
.jpg)
.jpg)
.jpg)
.jpg)
.jpg)
.jpg)
.jpg)
.jpg)
.jpg)
.jpg)
.jpg)
.jpg)