Engine
I did the engine next as I wanted a change from welding and I already had it on the table ready to be stripped and put back togther. I next went onto the body work.
27/04/2011
Well waiting in all day has paid off my parcels have come, that’s right parcels I wasn't expecting the floor pan but it has arrived, the other one should be here within 4 weeks or so, as for my other parcel I now have loads of bits to fit to the engine, I will probably do this later in the week after I have sorted the other bits of the chassis together. Anyway as always here are the pictures.
28/04/2011
Well today some more parts have come, the exhaust from Machine7 which I must say is some of the best service I have had in a long time, I also had some POR15 come, and I also went out to get some VHT (very high temperature) paint for the heater exchanges and the exhaust. The colour I have gone for is matt black because its gives that OEM look.
29/04/2011
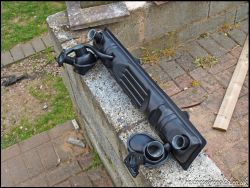
Not the biggest of updates again today, but a update none the less I have painted the heater exchanges and the exhaust with the vht paint that I got yesterday must say I am impressed any way I got a few pics.
Before
After
.jpg)
when my dad got home we decided to strip the engine read to clean and change all the gaskets. So off with the rocker covers and heads.
.jpg)
.jpg)
.jpg)
All simples really but when I managed to get the heads off in over covered a little problem.
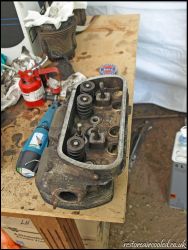
Yep a melted piston, this isn’t the exact news that I wanted to see, I think its happened because the piston ring has snapped so it has over heated and melted. Only the one piston has done it. But I will have to find some pistons from somewhere. After I had found this I decided to look at the heads because I know that they are prone to crack so after a look at them I found one has cracked.
Strangely this is the head that was on the other side of the engine, it currently seems to be getting from bad to worse. But it isn’t anything that isn’t fixable. That’s all I got done. Ohh and I managed to get a few last photos before I locked it up for the night.
And I also managed to get the last shot before I lock it all up.
01/05/2011
Well I have good news I have found an engine for cheaper than new pistons barrels and heads. £350 for a 1600 engine with code 'AB' on it so it’s a twin port engine that has just had a clutch change. It also comes with a Webber progressive carb. And they guy say the engine has done around 60,000 miles but I will still take this on to pieces and replace all gaskets. I shall be picking this tomorrow hopefully.
02/05/2011
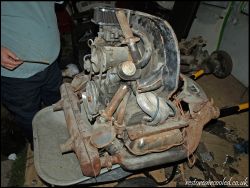
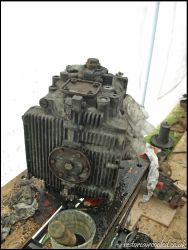
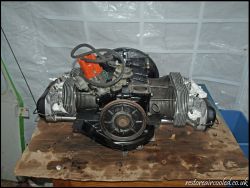
Well after 250 miles 4 hours and £350 I now have a 1600 engine with a 2 stage progressive carb, get me not much to say really when I’ve got the time I will break the good engine for parts and then strip this one and change gaskets and clean it up. Anyway I did get some photos but they aren’t the best but everyone knows what an engine looks like.
04/05/2011
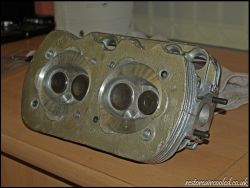
Well we stripped the new engine and took barrels rockers and heads off and I must say this engine is it lot better nick than the other one, the other bit that I like is that someone has converted it to a sump plug so it makes my life easier instead of doing all of the other bolts. It also had full chrome tin wear but it has seen better days I will remove this because it can cause overheating and I don’t fancy that happening really. I started to clean the heads up and lapping in the valves but then ran out of time so I will continue tomorrow.
05/05/2011
Today we started on a bit of a downer really because I looked at the head and the cracks are a little serious, so the gamble with the engine didn’t pay off which is a shame, but onwards and upward. I will order a top end re building kit. I started to warm the pistons up to get the pin out of the piston. Then one this had been done we started to take the head studs out of the engine so that they can be cleaned. Here is a photo on the left before on the right after.
To clean the stud I carefully put them in a drill at a low speed and use a blade to get crap off then fine sandpaper to get the nice and clean. We then took the flywheel clutch and other gubbing off the engine. Ready to clean the block
.jpg)
.jpg)
.jpg)
One I had done this I de greased it all ready to paint it when I get some paint.
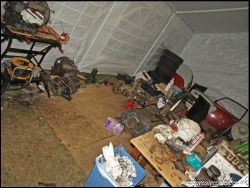
I would have got a photo of the whole workshop but it looks more like a beetle breakers yard at the minute so I didn’t bother.
06/05/2011
Whey my parts have finally come, really good service from vw heritage, ordered yesterday and they come today. Well I ordered a top end rebuild kit I didn’t realise how many bits it came with.
Safe to say a few bits came, right now that they are there might as well start building the head. First thing to lay out all the bits I will need to build it up.
So the first thing to-do was to Lapp the valve, this consists of putting some fin grinding paste on the valve so that they have a really good seal.
.jpg)
Put some grinding paste, and then make sure the valve has some oil on it then pop in into the head and spin, when its done it should look like this, after I have wiped all the paste off it.
All nice. Once all the valves had been done it looked like this.
Then on with the spings and all the other gubbings
.jpg)
Once I had got my head round the spring press I ended up with this
.jpg)
And then when they are all done I ended up with summat like this
07/05/2011
Still cracking with then we had to first put the piston ring on, but they all have to go a certain way but just look carefully.
.jpg)
.jpg)
.jpg)
Note all the writing on the pistons with all the spec of the piston on it. We then took all the bits down to the workshop; I first had to re seat the barrels so that a good seal was achieved so it don’t piss oil everywhere when its built.
.jpg)
I did this the same way that I had done the pistons before, by using grinding paste. When this was done it was then onto putting the pistons onto the rods.
Once this had been done we cleaned the rocker up and cleaned the streigher and the bottom of the sump but I havent got any pictures of this, we then after doing this went on to put the bots in the case, we notice that one went in more that the others, wierd.
.jpg)
.jpg)
And I did get one last shot before locking it up.
10/05/11
A little update but not much, we had the piston in as of the other day, we were just checking over them when we notice excess play so we thought it was best to split the block and have a look over it, bad news a lot of wear on the crankshaft so a new one is ordered, also new big end bearings, I did get a few photos so here they are.
14/05/2011
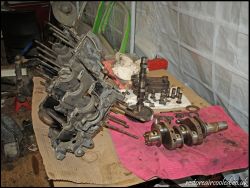
Not been doing much because I’ve been waiting on many different parts, but now they’re here so I can crack on with the building of the engine, first was to lay out the parts.
As you can tell from the photos the block had been cleaned and the crankshaft is a remanufactured to help cut costs down, and after a lot of heat and a little tap of the hammer the gears went onto the crankshaft. Then I had to put the conrods on, we referred to the manual which was a little confusing but we got there.
.jpg)
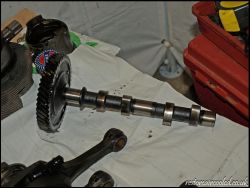
Next was to put it in the crankshaft and the cam shaft into one half of the block, and smear the sealant stuff that I decided to use.
The stuff that I was using on the block.
the next bit was a little fiddly because of the cam followers wanted to fall out but a little grease to hold them in a little but we managed it.
19/05/2011
Not a massive update but I went to Halfords and got some satin paint to paint the tin wear just to smarten it up. Anyway pics
20/05/2011
We went to fit the pistons and barrels but when we were fitting the barrels the rods were toot bit for the holes in the barrels so I phoned vw heritage and it turn out that they had sent the wrong ones, and that they were going to send some more tomorrow and take the other ones back. Sorted.
21/05/2011
The parcel has turned up, the best customer service I have had off a website in a long time. I would recommend them to anyone.
25/05/2011
I’ve not had too much time recently with coursework and extra hours at work to help pay for the beetle so I decided to paint the bock just to make it a little easier on the eye I decided I have some VHT matt paint already in so I picked that up and painted the block, once it had dried I didn’t like the finish because it just looked like dried oil, so I will nip Halfords tomorrow and see what they have got.
26/05/2011
A very small update, I went to Halfords and the best colour they had in was black so I got the gloss one that will hopefully look better.
27/05/2011
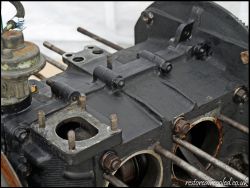
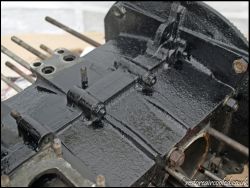
Managed to paint the block today with the paint that I purchased yesterday and it was tricky because I didn’t want it going into the block, but I soon managed it anyways the picture
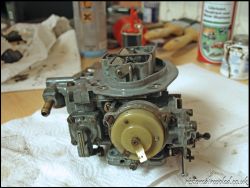
I also started to strip the carb and give it a once over and make sure nothing is broken or blocked so first I laid out the carb ready to clean it up
Then off with the choke and the top half of the carb
.jpg)
All the other bits and pieces jets floats etc
We went to put it back together but I ran out of carb cleaner so it will have to wait till tomorrow, also I have bought a few days ago a empi manifold that should fit on the carb, because the only one had holes is it.
28/05/2011
Today we got a fair bit done, which I was happy with because I can now see things taking shape, first thing we did was to put the piston rings on the piston, because the was a different set that the last ones then to squeeze the rings so that the piston would go down the barrels.
.jpg)
One we had done two we then had to fit the head and pushrod tubes, these is a little trick we did to fit the head so that the pushrod tubes just fit then fit the pushrods to just hole them in place, when made it easier than holding 4 tubes in place.
Then once done I had to torque the heads up in a certain order. And to fit the rocker, once fit the rocker I had to use the feeler gauge to make sure that the rocker is the correct distance from the pushrods.
.jpg)
Then on with the rocker cover and the clip, which was really tight because it was brand new.
.jpg)
When I had done this I did the carb because I was late and it took a while to do one side. The carb parts needed cleaning, once done the looked all new.
Then once all cleaned back together
30/05/2011
Well I a bit more work has been done on the engine I’ve managed to complete the other side of the engine, which is great, it is eventually starting to look like an engine. I didn’t bother with loads of pictures because they would just be the same as the other side. Only got a photo of when I had finished building it.
01/06/2011
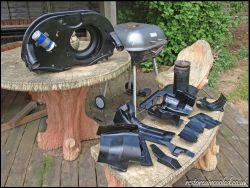
Got a lot done today which was great, it is starting to look more and more like a engine, the first thing that we did was to fit 2 pieces of tin where that fitted onto the barrels.
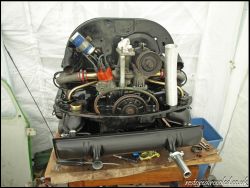
Got some nice shiny screws to do all the tin wear too next was to attach the heater exchanges and the exhaust this was a tricky job because they had to all be shuffled are so that they would fit. Once bolted up the next thing was to use the new fitting kit that I had got to join the exhaust and the heater exchanges. This was very fiddly because there wasn't much space.
.jpg)
.jpg)
Yet not another job that wasn't too easy the manifold this would be easy but I have to glue/seal the manifold pipes, first thing to do was to fit it but not too tight then mark where the pipe goes. Then once this is done take it off and use the sealant to bond the pipes in place then bolt the whole thing down and fit the stabiliser bar.
.jpg)
.jpg)
Whey!!! more shiny nuts, right the fan housing was the next bit that we fit. This was heavy and it didn’t want to fit so a few choice words were said and a quick hit with a hammer it fitted. Once we had done this we left it as it was.
02/06/2011
Not a massive update but a update none the lease, a few bits of tin wear fitted along with a new oil pressure switch and a oil filler cap.
03/06/2011
Now that my carb has been overhauled I need to make a gasket for it, I could get one from Webber but at £36 I think I will make one. That and I have never made one so it will be something new. First thing was to get a piece of cardboard big enough.
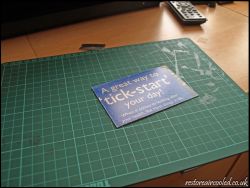
This come from a cereal box next was to lay it on underside of the carb, the side where you want to gasket. Then lightly tap round all the edges with the handle of a screwdriver just enough to mark it.
Then was the tricky task of cutting it all out very carefully and you end up with this.
.jpg)
Then to see if it fits all nice
.jpg)
And then to bolt it all together.

.jpg)
.jpg)
.jpg)
.jpg)
.jpg)
.jpg)
.jpg)
.jpg)
.jpg)
.jpg)
.jpg)
.jpg)
.jpg)
.jpg)
.jpg)
.jpg)
.jpg)
.jpg)
.jpg)
.jpg)
.jpg)
.jpg)
.jpg)
.jpg)
.jpg)
.jpg)
.jpg)
.jpg)
.jpg)
.jpg)
.jpg)
.jpg)
.jpg)
.jpg)
.jpg)
.jpg)
.jpg)
.jpg)
.jpg)
.jpg)
.jpg)
.jpg)
.jpg)
.jpg)
.jpg)
.jpg)
.jpg)
.jpg)
.jpg)
.jpg)
.jpg)
.jpg)