Tear Down
This is the break down of both the cars and stripping them down to a bear shell, after this you can move onto the chassis which is the next stage of the restoration.
06/04/2011
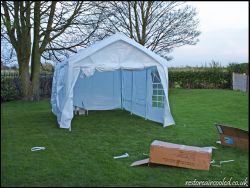
Today I received through the post a 6m x 3m gazebo with attached sides, I think that this will be plenty big enough for the beetle build to take place; it took me 2 or so hours with help from a friend of mine Michael to put the tent up. I suppose the high winds that we had today wasn't the best idea I have had but I wanted to make sure it was be enough. Any ways here are some pics
As you can see it is quite substantial in size but I think it may just be big enough! It took 2 hours to put up and yeah half of that to put down, I think to be fair it was harder to put it down that put it up and in typical fashion it won’t fit in the boxes but soon I will hopefully putting it because I will have a beetle.
07/04/2011
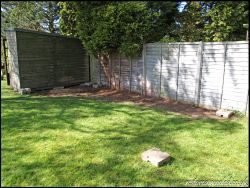
Continuing with the preparation with the storage of the beetle me and my dad decided to tidy round the back of the shed where we have decide to put the gazebo/tent this may sound easy but we took 2 or so hours to get rid of the crap that was hiding round there, we even managed to find 2 dead birds nice...
As you can see from the photos the block have been layout to show where the gazebo will go, also from the photos you can see where all the rubbish was stored because no grass has grown.
08/04/2011
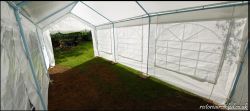
Still carrying on with the prep me and my dad put the base down, this does sound easy but as always it isn’t. The piece of garden that I have chosen is behind the shed so it will be sheltered from a lot of the wind. When we initially put the block down they weren’t level so the first job was to sink some of the blocks so that the base was level. Then we construction the gazebo again! And put in onto the base, then bolted it down so that it isn’t going any were.
As you can see from the photos the floor is full of mud so the plant are to get 4 bits of 8 x 4 so that I am working on wood not the grass and mud.
11/04/2011
I have good new in the beetle searching part, I have managed to find a beetle that I am happy with and managed to get it nearly within budget £1150 to be exact, the best part is that the guy that I am buying them off will be bringing them 150 miles to my house which will save me a lot of time and money, I will be paying for them today and they should be getting to me on Thursday and Friday. It will take two day because there is another benefit about my purchase. There are two beetles and spares. I have been told by the buyer that one of the beetles has a engine and the other beetle has a very good body so I will be making one good beetle out of two not so good beetles. It also comes with a lot of spares which is quite handy and could save me a lot of money. The only bit that I can find wrong is that I will have to sight up to vwoc (vw owners club) for a birth date certificate to prove the dvla that I get free tax.
12/04/2011
When my dad had come home from work he had an early birthday surprise a snap on MIG welder. All I can say is that I am over the moon it some with some steel wire and a BOC gas bottle. But still waiting for the delivery of the two cars which should be here in 2 days.
14/04/2011
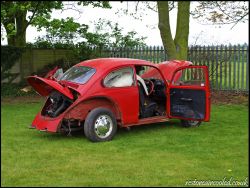
Well the day is finally here, the beetle has come the red one this is the one where I am getting a engine and gear box from all I can say it that I think its uber cool everything is so basic, must say the chassis and body is shot but this one isn’t the one I have been repairing, anyway here are the pics.
Here is how it arrived with a heap load of bits with it took some getting out of the car too.
15/04/2011
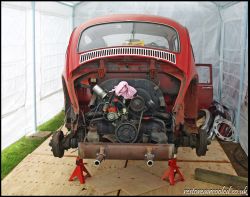
Small update today which is good, when I first got the red beetle it had two batteries in it I tried to fire the engine but they were flat so I left one on charge all night. Then this morning I got to the battery I had left on change put it in but it wasn't any good, must be too old. Anyway I took the battery out of my Clio put it in the beetle and it fire and idled for 15 or so seconds but that was good enough for me. So I went for a brew and a ponder, after this me and my dad though to about the taking of the engine out so on we go, it took a lot of jacking up and wood to get the car high enough. Once we had done this outcome the angle grinder to cut the rear clip off so it would be easier.
With much heaving and cursing the engine come out.
.jpg)
.jpg)
.jpg)
The once we had the engine out some more cursing to put the engine on the work bench so I can work on it.
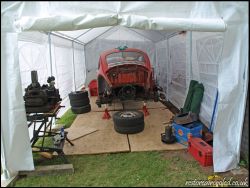
Hopefully we will be able to get the gearbox out before Tuesday so the good shell can sit in the shelter. Oh and one more photo as its put away for the night.
16/04/2011
So today I decided to take some parts of the engine to bit ready to clean up and put back together so on we go first the exhaust.
.jpg)
.jpg)
It was only a couple of bolts but the rust had taken grip so out came a hammer, it soon moved next it took all the carb, coil, dyno, dizzy and the fan and housing which left me with this.
A few bits left to do on the engine but I’m happy with the progress and I’ve took a few random snaps while I was there. Just to show how bad of condition the red beetle was
All I can say is hopefully my other car will be in better shape!
I’m happy to say that is full of spare parts such as lights, trim and pipe work. And of course the photo took before lock up for the day.
17/04/2011
The gear box was on the first thing to do, so I got my tools and me and my dad set about getting it out, we first undid the bolts holding the boots together the 12 nut (6 on each side) were some of the hardest bolts to undo that I’ve come across hitting the bolts with the trusty hammer seemed to free the rust making it that bit easier to undo. Then afterwards I undid the other cables and what not’s. Then it was onto the mount these had plenty of rust so the hammer was out yet again along with some releasing oil to get it going once we had undone them we then put the jack under the gear box and jacket it so that it sat off the mounts and pulled it forward, and that was that it was simple... ish we also managed to get the rest of the tin wear off the engine read to strip it, any way here are some pics
Once the gear box was round we then took it off the stand and put the wheels back on it.
.jpg)
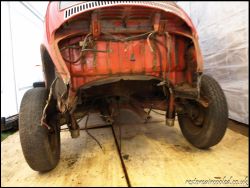
Note on the pictures above the amount of positive camber because there is no weight on the back wheels, I also moved everything so it was neat and easy to get the red car out and the white one in on Tuesday
.jpg)
And not for the last shot before locking it up for the night
19/04/2011
The day has finally come were my other ‘better’ beetle comes, I was like waiting for Christmas but it eventually come and it is in a lot better shape than the red chassis but it still by no means perfect a quick look of things means that the floor pans look as if they could need some tlc but I think it will make a very good chassis to start upon. And here is a few photos of when it first turned up.
As you can see from the photos the body has been braced because the heater channels have been replaced, I also replaced the wheels so it was all a matching set.
steel mini lite wheel look rather odd but they do then job I also unbolted the shell from the chassis read for lifting off when a few of my mates pop down.
As you can see from the photos they is more rust but it is all part of the restoration. I managed to rally a few of my mates round to give me a lift with the body so off with the body and on to a stand. Ohh and thanks lads for coming round.
.jpg)
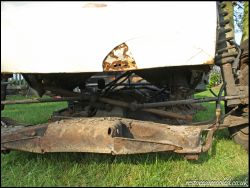
I also got some photos of the rust and the general condition of the shell.
As you can see from the photos the body isn’t in a bad condition there are a few areas of rust but nothing too major just a little bit of patching will be needed but im sure when it comes to it there is a lot more hiding, now that I had just a chassis on its own it had the best spot in the garden, the gazebo.
.jpg)
Mean that the red beetle gets the joys of living outside for the time been.
I also took some photos of the chassis that I will be using, this doesn’t look too bad there is a fair bit of work to be done but I have seen worse brought back to life.
20/04/2011
Not a massive update but I managed to find the owner of beetle before the owner that I bought it off, which was a surprise the guy just happened to comment on build thread I found that he was the one that put 3 Empi 8 wheels on it. He was also the person who braced the shell ready. The guy was also the one that braced the body so he could start work upon it. I also found out that the previous owner was from Coventry, and he called the beetle ‘Ceasar’ so the beetle has a name.

.jpg)
.jpg)
.jpg)
.jpg)
.jpg)
.jpg)
.jpg)
.jpg)
.jpg)
.jpg)
.jpg)
.jpg)
.jpg)
.jpg)
.jpg)
.jpg)
.jpg)
.jpg)
.jpg)
.jpg)
.jpg)
.jpg)
.jpg)
.jpg)
.jpg)
.jpg)
.jpg)
.jpg)
.jpg)
.jpg)
.jpg)
.jpg)
.jpg)
.jpg)
.jpg)
.jpg)
.jpg)
.jpg)
.jpg)
.jpg)
.jpg)
.jpg)